Painting a room may seem like a simple task, but without the right preparation it’s easy to end up with splashes on doors, sockets, switches and even skirting boards. If you want a clean, professional finish, we’ve got the best tips to avoid stains and save you headaches.
You can find more similar tips in our interior painting category or learn about other application tricks.
Contact our professionals
Prepare the surface and the environment well
Before opening the paint can, be sure to protect all items that you are not going to paint:
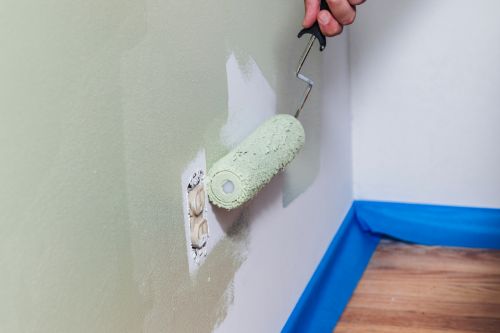
- Remove plugs and switch covers: all you need is a screwdriver. By removing them, you can paint without fear of leaving jagged edges.
- Cover doors and frames with plastic or protective paper and masking tape. Don’t skimp on protection, especially in areas near the roller.
- Protect skirting boards and floors with wide tape and continuous paper or thick plastic.
Use the right tape
Not all masking tape will do. Use quality masking tape that adheres well but will not damage the surface when removed. Apply firmly with your fingers to avoid paint leaks.
An extra tip: if you want clean edges, apply a very thin coat of the same base colour as the surface before painting over it. This seals any gaps in the tape.
Use tools with precision
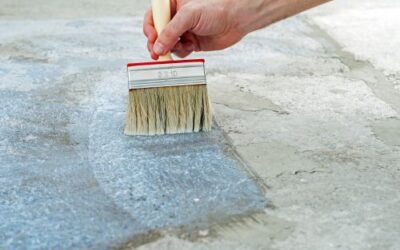
- Angled brushes: ideal for trimming corners, frames or delicate areas without smudging the surrounding area.
- Small foam rollers: perfect for areas near sockets, windows or doors.
- Anti-spatter trays and grid trays help to control overspray.
Be careful with the amount of paint
Avoid over-wetting the brush or roller. Excess paint causes drips and splashes, especially when working near sockets or frames. Remove the excess with the grid before applying.
Remove the tape at the right time
Don’t wait until the paint is completely dry before removing the tape. Ideally, remove the tape when the paint is slightly damp to the touch, to avoid lifting the painted edge and ruining the line.
Extra tip: plan the order of painting well
Start with the ceiling, then the walls, and leave the details (corners, edges and delicate areas) for last. This will avoid splashes on finished surfaces.
Maintenance after painting
Once the room has been painted, make sure to clean up any tape residue, collect the protective plastic and ventilate properly. If you used water-based paint, you can wash brushes and rollers with warm water and neutral soap to preserve them. A good cleaning at the end allows you to keep your tools ready for the next time.
Result: a renovated room, without stains or touch-ups.
Stain-free painting is possible if you follow a good strategy and use the right materials. With these tips, you’ll achieve a clean, professional, frustration-free finish. And remember: good preparation is everything.
If you’ve found this useful, we invite you to visit our paint application guides section or read more about interior renovations on our blog. Your home deserves the best finish!
Other publications that may interest you
Exterior floor paint: what type to use and how to apply it correctly
Protecting an exterior floor - terrace, porch, garage or pedestrian access - is not just about aesthetics: it prevents cracks, leaks and premature wear and tear. Choosing the right exterior floor paint and applying it methodically ensures a durable and...

How to know if the humidity in your house is due to condensation, filtration or capillarity
The stain you see on the wall does not always have the same origin, and making a mistake when it comes to treating it can make the problem worse and make the repair more expensive. Below you will learn how to differentiate the three most frequent sources of damp and...
How often should I re-treat the exterior wood?
Wood that lives outdoors faces a relentless script: UV radiation that discolours, rain that swells the fibre, saltpetre that dries it out and fungus that sets in as the protective film ages. The result is visible to the naked eye: the original colour fades, fine...