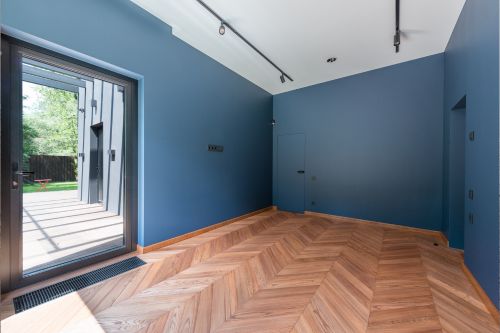
Selecting the right paint for interior walls may seem simple, but in reality, there are several important considerations that can influence the final result. From the type of paint to the preparation of the walls, each step is crucial to achieving a finish that is not only aesthetically pleasing, but also durable.
Contact our professionals to paint the walls of your home
Step 1: Explore different paint types
The first important decision is to choose the type of paint that best suits your needs and your home environment.
- Plastic (acrylic) paint: This is the most common type of paint used in interiors. It offers excellent durability, is water-resistant and dries quickly, making it easy to clean and maintain. It is ideal for living rooms, hallways and bedrooms.
- Tempera paint: Although less durable than plastic paint, tempera paint is a good choice for ceilings and walls in areas that do not require frequent cleaning. Its matte finish helps to hide surface imperfections.
- Satin paint: If you’re looking for a finish that offers a light sheen and is easy to clean, satin paint is an excellent choice. It works well in kitchens and bathrooms, where moisture resistance is crucial.
- Chalk paint: Perfect for creating a vintage or rustic effect on walls or furniture, this paint has a matt finish and is mainly used for decorative projects.
Each type of paint has its own advantages and suits different needs, so it is important to consider the specific use of the room before making a decision.
Step 2: Decide on the finish according to your needs
The paint finish significantly influences the final look of the room and how the surfaces are perceived.
- Matt: This finish is ideal for hiding imperfections on walls, as it does not reflect much light. It is perfect for bedrooms and ceilings, where frequent cleaning is not required. However, it is not as hard-wearing as other finishes, so it is not ideal for high traffic areas.
- Satin: Offers a soft sheen that is more resistant to dirt and easy to clean. It is a popular choice for children’s rooms, kitchens and bathrooms, where the combination of durability and ease of cleaning is essential.
- Gloss: Although less common on walls, this finish is extremely durable and easy to clean, making it ideal for mouldings and doors. However, it can highlight imperfections in walls, so it is best used on smooth, well-prepared surfaces. Choosing the right finish can make the difference between a successful painting project and one that needs constant touch-ups.
Step 3: Preparation and paint application
La preparación es la clave para un acabado duradero y de alta calidad. Estos son los pasos esenciales que debes seguir:
- Cleaning: Before painting, make sure the walls are clean and free of dust, grease and other debris. This will ensure that the paint adheres properly and is applied evenly.
- Repair: Fill any cracks, holes or imperfections in the wall with putty and sand the surface once dry. This will provide a smooth base for the paint and improve the final appearance.
- Primer: If you are painting on a new wall or a surface that has been repaired, it is advisable to apply a primer. This helps seal the surface and provides better adhesion for the final paint.
- Application: Use high-quality brushes for edges and details, and a roller for larger areas. Apply the paint in thin layers, starting from the corners and moving towards the centre of the wall. Depending on the type of paint and colour chosen, you may need to apply two or more coats to achieve full and even coverage.
Step 4: Additional tips for a perfect finish
To make sure the end result is the best possible, consider these additional tips:
- Colour test: It is advisable to test a small sample of paint on the wall before painting the entire room. This will allow you to see how the colour looks in different lighting conditions, both natural and artificial.
- Proper tools: Investing in quality tools, such as brushes, rollers and trays, can make a big difference to the final finish. Good quality tools apply paint more evenly and make the painting process easier.
- Ventilation: Make sure the room is well ventilated while painting and during drying. This will not only help the paint dry faster, but will also reduce the smell of paint.
- Maintenance: Once the paint is dry, consider applying a protective sealer to high traffic areas or walls that may be exposed to stains. This will help prolong the life of the paint and keep the walls looking good for longer.
Professional interior painting
While painting interior walls may be a project you decide to undertake yourself, enlisting the help of professional painters can make a big difference, especially if you’re looking for a flawless, long-lasting finish. Professionals have the experience and tools to tackle even the most difficult surfaces and ensure the job is done efficiently. They can also offer personalised advice on the best types of paint and finishes for each space in your home.
Other publications that may interest you
How often should I re-treat the exterior wood?
Wood that lives outdoors faces a relentless script: UV radiation that discolours, rain that swells the fibre, saltpetre that dries it out and fungus that sets in as the protective film ages. The result is visible to the naked eye: the original colour fades, fine...
Waterproofing paint: what it is and when to apply it outdoors
Leaks don't usually give you any warning. One day you discover a dark spot behind the wardrobe or a corner of the ceiling with buckled paintwork and you realise that damp has been working quietly for some time. In climates with heavy rainfall or in homes close to the...

Most resistant paint types for facades in coastal areas
The façades overlooking the sea are under constant tension. While holidaymakers enjoy the breeze and the sound of the waves, saltpetre is deposited on walls and railings, humidity penetrates through every micro-fissure and the sun, generous in hours and intensity,...