Painting a ceiling may seem like a simple task, but to get a professional finish it is important to follow a series of steps and keep a few tricks in mind. From choosing the right paint to applying it with the right techniques, every detail influences the final result. In this article we explain step by step how to paint a ceiling, the materials you need and the most common mistakes to avoid.
Contact our professionals
Preparation before painting the ceiling
According to home improvement portal The Spruce, proper preparation of the ceiling is essential to ensure that the paint adheres evenly and that the finish is durable. Thorough cleaning and proper priming can make all the difference to the final result.
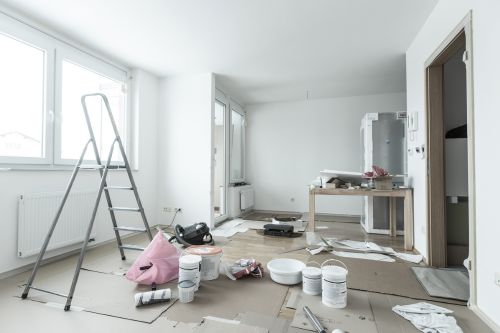
Before starting, it is essential to prepare the surface and work area. Good preparation is the key to a long-lasting result.
1. Protect furniture and floors
Cover furniture with protective plastic sheeting and place paper or plastic on the floor to avoid paint splashes. If possible, remove furniture from the room to work more comfortably.
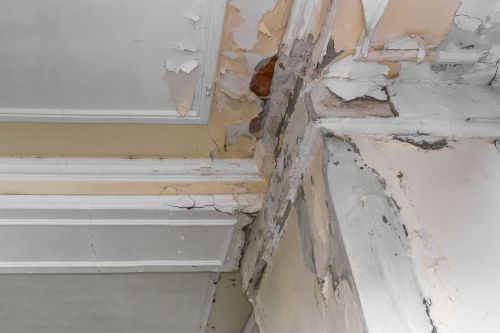
2. Clean and repair the ceiling
Make sure the surface is clean and free of dust or grease. In case of cracks or imperfections, use a special ceiling filler and sand gently to obtain a smooth surface.
3. Apply a primer if necessary
If the ceiling has damp stains or is very dark in colour, applying a primer will help the paint to adhere better and cover evenly.
Choosing the right paint
According to the experts at Dulux, the choice of ceiling paint depends on the desired finish and the type of surface. Matt paints are ideal for smooth ceilings, while satin finishes can be an excellent choice to reflect more light in dimly lit rooms.
When painting the interior of a house, it is advisable to choose a matt paint, as it hides imperfections better and avoids annoying light reflections. For bathroom or kitchen ceilings, it is preferable to opt for a damp-resistant paint.
If you also want to renovate the exterior and paint facades, you can choose a paint that is resistant to climatic agents, ensuring greater durability.
How to paint a plaster or plasterboard ceiling
Plasterboard ceilings require special treatment to ensure a uniform and durable finish.
Painting a plasterboard ceiling
Plasterboard is a widely used material in modern construction due to its versatility and smooth finish. However, before applying the paint, it is essential to seal the joints and apply a suitable primer to prevent the plasterboard from absorbing too much paint.
- Cleaning and sealing joints: Apply a special plasterboard filler to the joints and sand smooth.
- Primer application: Use a sealing primer to prevent uneven absorption of paint.
- Paint in thin layers: Apply the paint in two or three thin layers to avoid marks and to achieve a homogeneous finish.
Painting a plaster ceiling
Plaster ceilings may have a more porous texture, which requires the use of a paint with a higher hiding power. In addition, if the plaster has decorative mouldings, it is advisable to use a brush for the finer details.
- Repair cracks or fissures: Use a special putty for plaster and sand until it is uniform.
- Apply sealing primer: This will help reduce paint absorption and improve adhesion.
- Paint with a short nap roller: To prevent the texture from absorbing too much paint and to maintain a uniform finish.
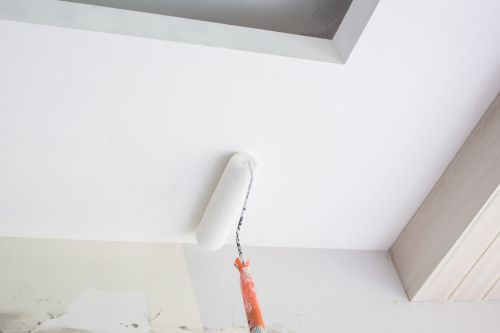
Steps to paint a ceiling properly
1. Use painter’s tape at the joints with the walls
Tape corners and mouldings to prevent paint from staining the walls. This will help keep the edges clean and sharp.
2. Apply the paint in the corners with a brush
Before using the roller, paint the edges and corners with a brush. This will make it easier to apply the paint later with the roller without leaving unpainted areas.
3. Use a roller for the rest of the ceiling
Use a medium or long nap roller for smooth or textured ceilings. Apply the paint in a ‘W’ motion to better distribute the paint and avoid marks.
4. Apply at least two coats of paint
For a uniform finish, it is recommended to apply at least two coats of paint, allowing the paint to dry completely between coats according to the manufacturer’s instructions.
5. Remove masking tape before the paint is completely dry
To prevent the paint from peeling off when removing the tape, do so before the paint is completely dry.
Common mistakes when painting a ceiling and how to avoid them
- Not preparing the surface properly: Pre-cleaning and repairing beforehand guarantees a better result.
- Using too much paint on the roller: This can cause drips and an uneven finish.
- Not respecting the drying time: Painting on a wet coat can cause marks and damage.
- Not using a stable ladder: To avoid accidents, make sure you use a sturdy ladder and work safely.
Painting a ceiling requires patience and technique, but with the right materials and following these tips, you will achieve a professional result.
If you are thinking of a complete renovation, in addition to painting the ceiling, you can consider choosing colours that match the walls and furnishings. And if you also want to improve the exterior of your home, painting facades with modern and resistant tones will give a new life to your home.
Follow these steps and enjoy a perfectly painted ceiling that will bring light and harmony to your home.
Other publications that may interest you

Maintenance of exterior timber on homes in Jávea: varnishes, wood stains and treatments
Exterior wood adds warmth, character and aesthetic value to a home, but in coastal areas such as Jávea it needs proper maintenance. Sun, ambient humidity, sea breeze, temperature changes and exposure to rain can damage doors, windows, pergolas, beams, railings,…
Painting before selling or letting a property: colours and finishes that help make a better impression
Painting before selling or renting out a property may seem like a minor detail, but it often has a strong impact on the first impression. A home with clean walls, well-chosen colours and carefully finished surfaces conveys order, spaciousness and good maintenance. By…
Condensation, filtration or capillarity: how to identify the source of damp
Damp on walls and ceilings does not always have the same cause. A black stain next to a window, a yellowish mark on the ceiling or a wall that is flaking from the floor may appear to be similar problems, but the solution varies completely depending on the cause….